Telnet
Telnet is one of the network protocols which can be used to gain command line interface (CLI) access to a Humax PVR running customised firmware. As the firmware has matured it has become less necessary to use telnet but there are still cases where command line access is essential to troubleshoot or fix an issue.
In order to gain access to your Humax via telnet, you will need a piece of software called a telnet client installed on a computer on the same network as the Humax.
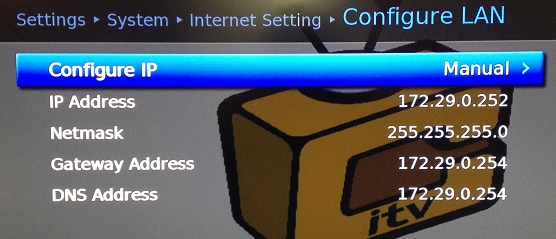
You will also need to know the IP address of your Humax; the easiest way to determine this is to use the on-screen menus and navigate to Settings -> System -> Internet Setting -> Configure LAN. The IP address is shown on the second line.
Connecting from a Microsoft Windows Computer
Some versions of Windows come with a built-in telnet client and on others it is provided as an optional component. This client has several limitations however so it is recommended that you download the PuTTY Telnet Client.
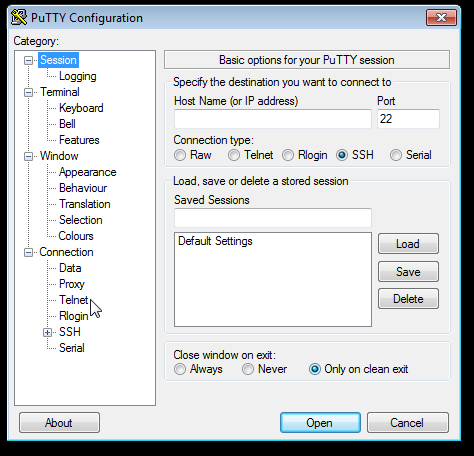
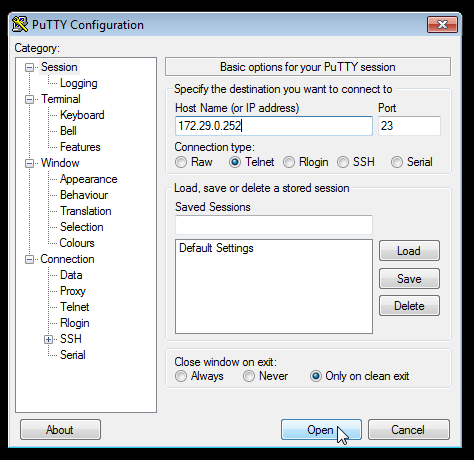
When you start PuTTY, you are presented with an initial configuration screen:
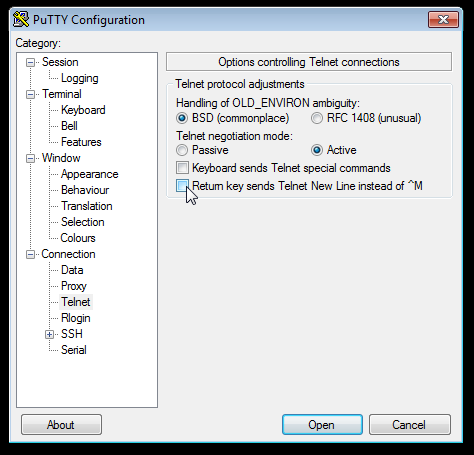
First, click on the telnet option at the left hand side which will show the telnet options:
Make sure that the last option Return key sends Telnet New Line instead of ^M is not checked and then click on Session at the top left to return to the main settings screen.
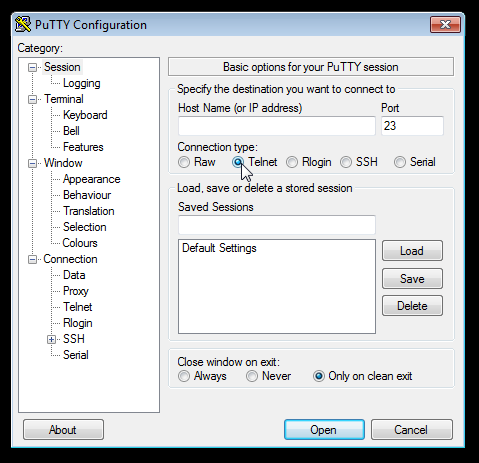
Under Connection Type select Telnet.
At this point, you can click on Default Settings in the Saved Sessions list and then click on the Save button alongside so that PuTTY remembers these changes for next time.
Now enter the IP address of your Humax into the Host Name (or IP address) box and click the Open button at the bottom.
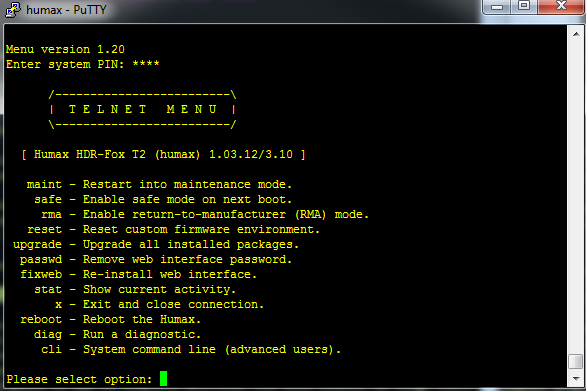
Next, you should see a PuTTY window open and, if your connection is successful, you will be prompted to enter the system PIN (0000 by default) and then the telnet menu will be displayed.
Connecting from a MacOSX Computer
MacOSX 10.12 Sierra and earlier came with a good command line telnet client that can be invoked from the default terminal. This is no longer included with MacOS 10.13 High Sierra and later, but can be installed by various methods; see http://osxdaily.com/2018/07/18/get-telnet-macos/ for details.
First, open the Terminal application - the easiest way is to use Spotlight to find it:
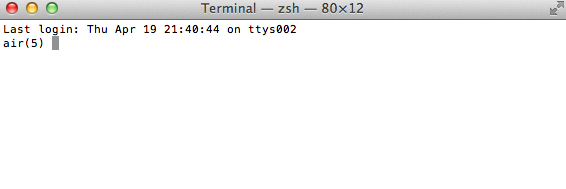
Once Terminal is open, you will see a window on the screen that looks a little like the following image. It may vary slightly depending on the configuration of your computer.
At the prompt, type telnet <Humax IP Address> and, if the connection is successful, then you will be prompted to enter the system PIN (0000 by default) after which the telnet menu will be displayed.
